
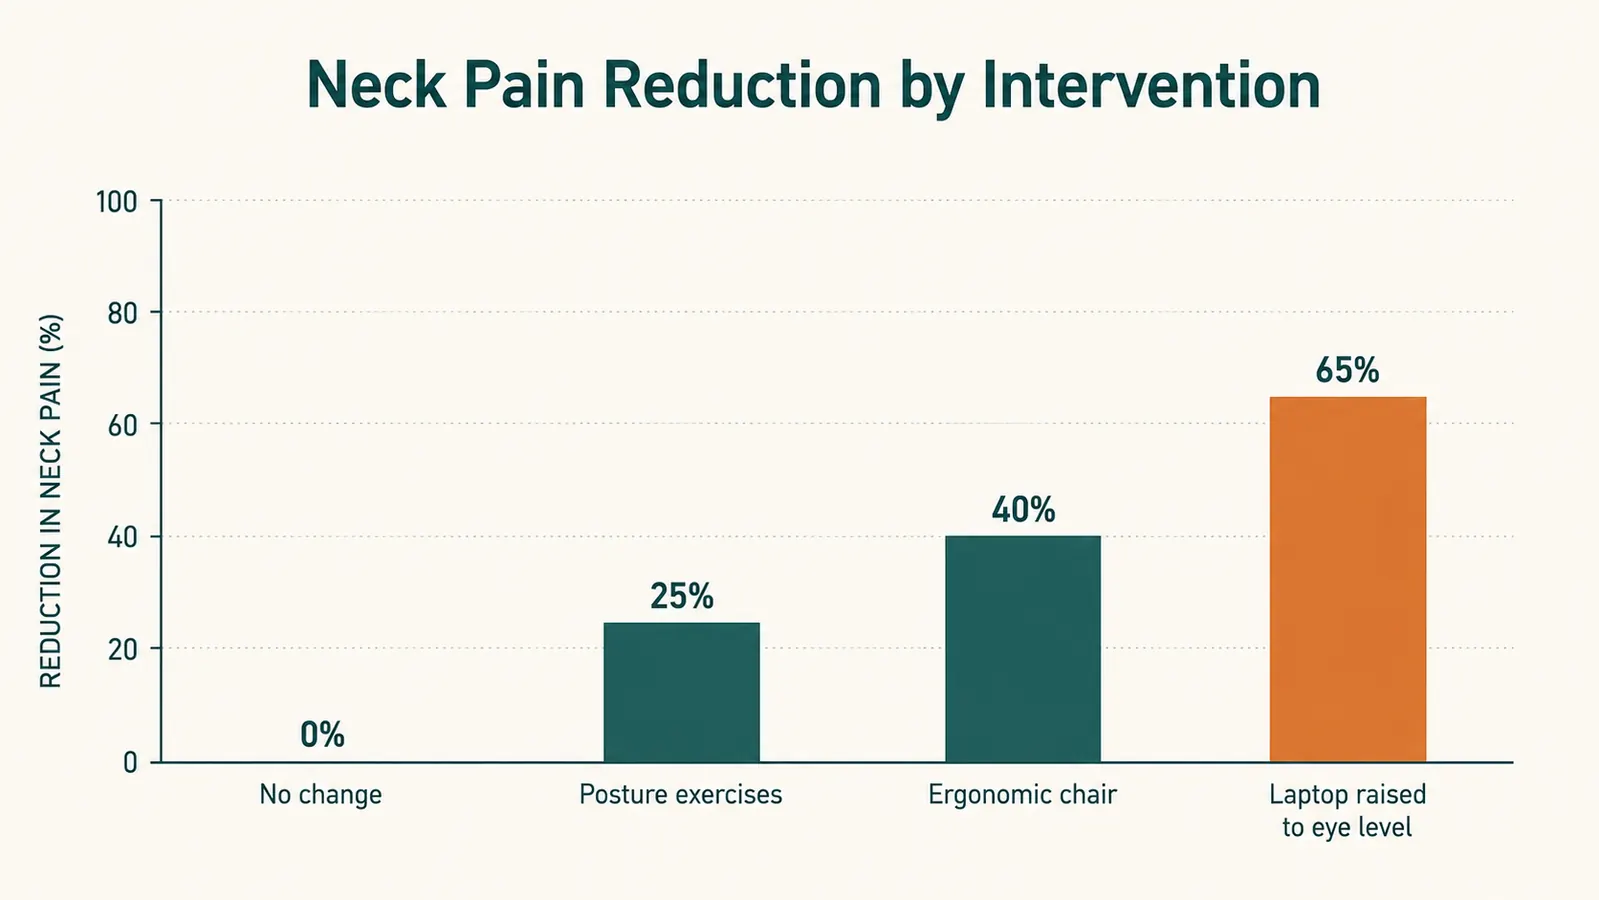
I spent almost a year blaming my chair for the neck and shoulder tightness that hit me every afternoon around 3 p.m. I bought a lumbar pillow. I adjusted the chair height four different ways. I even bought a new chair. The 3 p.m. neck ache kept showing up on schedule. It was not until a physio spent about ninety seconds watching me work and pointed at my laptop screen that I understood the real problem. My laptop sat flat on my desk, which meant my neck was bent forward at roughly 30 to 45 degrees every single hour I was at the keyboard. That is the equivalent of carrying an extra 40 pounds of force on your cervical spine, according to research published in Surgical Technology International. No chair fixes that. Screen height does.
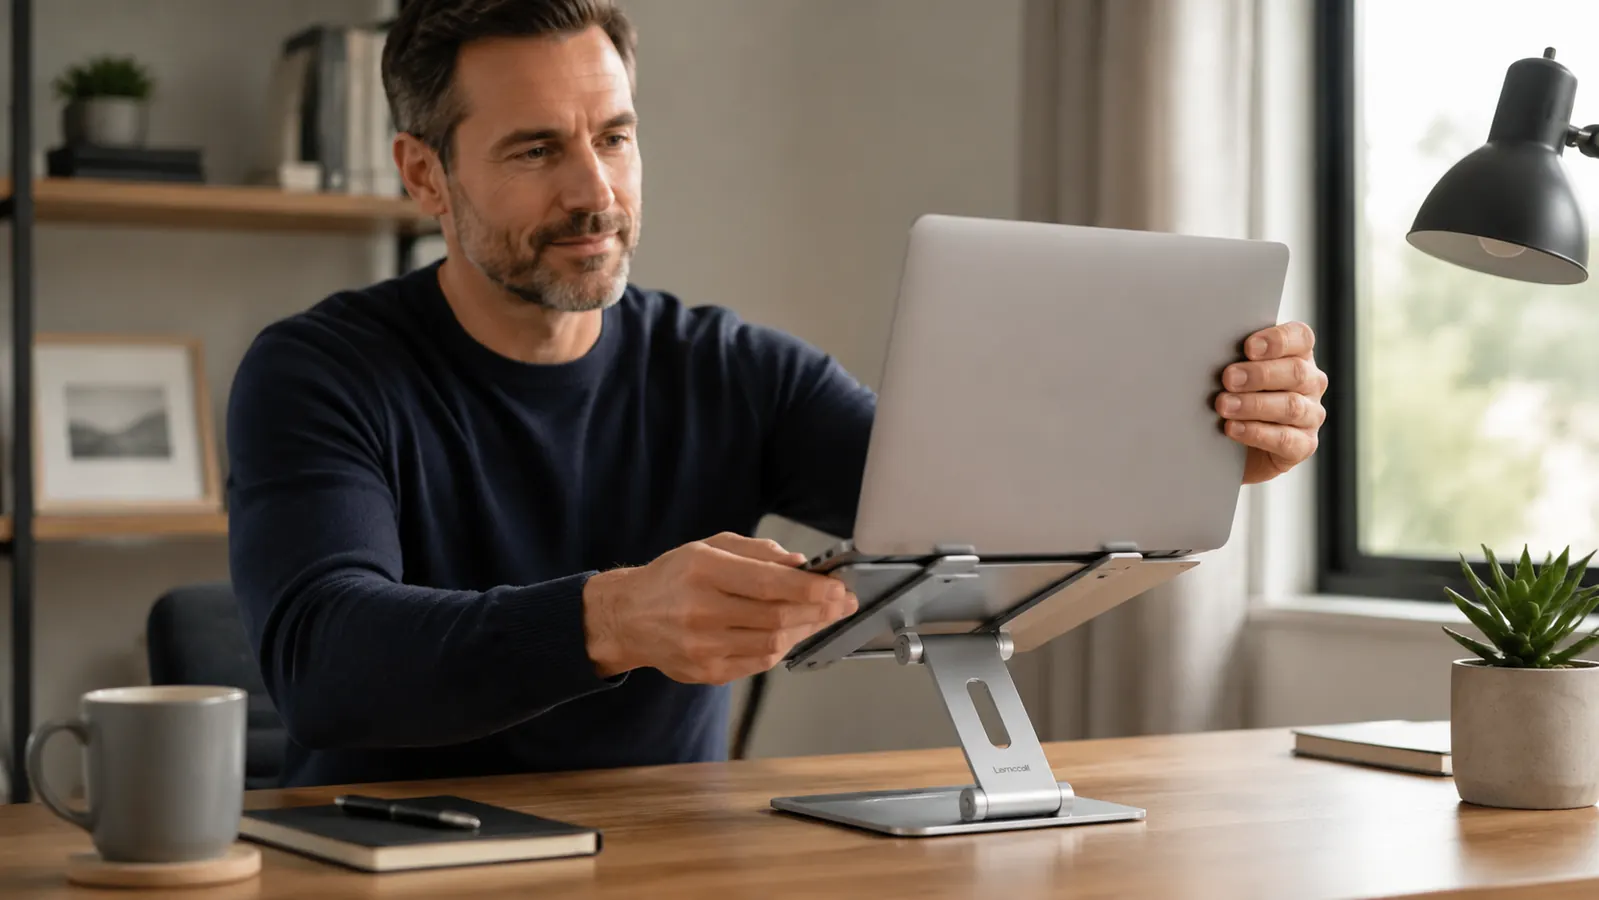
If you work from home on a laptop and your neck hurts by mid-afternoon, this guide is for you. The fix is straightforward, takes less than an hour to set up, costs far less than a new chair, and it actually sticks. The core tool is a laptop stand that raises your screen to eye level. I use the Lamicall Adjustable Laptop Stand, which has been on my desk every day for ten months. But the stand alone is only step one. The steps below cover the full picture so you get lasting results rather than a two-day improvement followed by the same old ache.
Still working with your laptop flat on the desk? That 30-degree neck tilt adds up to serious strain by afternoon.
The Lamicall Adjustable Laptop Stand raises your screen to eye level in seconds. Aluminum build, six height slots, fits 10 to 16-inch laptops. Check the current price before you read further.
Amazon Check Today's Price on Amazon →Step 1: Find Your Neutral Eye-Level Height
Before you adjust anything, you need to know what neutral eye level looks like for your body. Sit in your chair the way you actually sit during a working day, not the ideal posture you perform when someone is watching. Look straight ahead at the horizon. The top edge of your monitor or laptop screen should land right at or just below that horizontal line. If it is more than an inch or two below, you are forcing your neck to flex forward every time you read the screen. If it is above eye level, you are extending your neck upward, which creates a different but equally real set of problems.
A quick way to check: put a strip of painter's tape at eye level on the wall behind your laptop. Then look at where the top of your current screen lands. Most people discover a gap of three to six inches, which is significant. The Lamicall stand's six adjustable height settings cover a range from 2.4 inches to 6.7 inches of lift, which is enough to put almost any seated worker at neutral eye level without any tools or guesswork. Lock in the height that puts your screen top right at or just below that tape line, and leave it there.
Step 2: Add an External Keyboard and Mouse (This Is Not Optional)
Here is the part people skip, and it is the part that makes the stand useless if you skip it. The moment you raise your laptop screen to eye level, the built-in keyboard is too high to type on comfortably. If you try to type on a raised laptop keyboard, you are trading neck strain for shoulder and wrist strain. You need an external keyboard and mouse placed at desk height while the screen stays up at eye level. This is what separates a genuine ergonomic setup from a ten-dollar book-stack that just moves the problem from your neck to your wrists.
You do not need an expensive keyboard. A basic wireless keyboard and mouse set in the thirty to fifty dollar range is fine for most people. If you already have typing-related wrist or forearm tension, a split ergonomic keyboard like the Logitech K860 is worth the extra investment. For the purposes of this guide, the important thing is that your keyboard is flat on the desk, your elbows are at roughly 90 degrees, and your wrists are straight when you type. The screen is up on the stand where it belongs, and your hands are down where they belong. That combination is what eliminates the strain.
Step 3: Set Your Desk and Chair Height So Your Elbows Are at 90 Degrees
Screen height and keyboard height both depend on your desk and chair being set correctly first. The sequence matters. Start with your chair. Raise or lower it until your feet are flat on the floor (or on a footrest) and your elbows, when your arms hang loosely at your sides and you bend them, land right at desk height. If your desk is too high for this position, you can lower your chair and add a footrest. If your desk is fixed and too low, a monitor arm or taller stand can compensate on the screen side, but keyboard ergonomics become harder. Most standard desks are 29 to 30 inches tall, which is correct for someone around 5'9" to 5'11". If you are shorter than that, a chair footrest is usually the easiest fix.
Once your chair and elbow height are dialed in, adjust the laptop stand until the top of the screen is at neutral eye level. Do this in order, not the other way around. People who adjust the stand first and then try to adjust the chair often end up with a screen that is right but elbows that are awkward, which shifts the strain from the neck to the shoulders.
Step 4: Position the Screen at the Right Distance From Your Eyes
Height is the primary fix for neck pain. Distance is the secondary fix that determines whether your eyes and the small muscles around them are also under unnecessary strain. The general rule is that your screen should be at arm's length, meaning roughly 20 to 28 inches from your eyes. The exact distance depends on your font sizes and screen resolution. A simple test: sit in your working position and extend one arm straight toward the screen. Your fingertips should just about touch the screen. If your screen is closer than that, you are likely leaning forward or squinting, which pulls the neck into flexion even from a raised position.
The Lamicall stand has a small tilt adjustment in addition to height. This lets you angle the screen back slightly so the top of the display tilts away from you by a few degrees. That small tilt compensates for the fact that your eyes naturally rest at a slight downward angle, and it reduces glare from overhead lights. Aim for the screen face to be roughly perpendicular to your line of sight, or tilted back by no more than 10 to 15 degrees. Beyond 15 degrees of tilt, you start craning your neck forward to read the bottom of the screen, which defeats the purpose.
Step 5: Build a Micro-Movement Habit Into Your Workday
A perfect ergonomic setup still leaves you sitting still for hours at a time, which is its own problem. Static posture, even correct static posture, causes muscular fatigue and reduced blood flow to the neck and upper back. The fix is not to stand all day or to buy a treadmill desk. It is to move briefly and often. A practical rule is the 20-20-20 pattern: every 20 minutes, take 20 seconds to look at something 20 feet away and roll your shoulders back twice. That is it. It interrupts the static load before the tension has time to build into pain.
A few targeted movements are particularly effective for the muscles that take the most strain from laptop work. The chin tuck is the most important: sit upright, look straight ahead, then draw your chin straight back as if making a double chin. Hold for five seconds and release. This directly counters forward-head posture and activates the deep cervical flexors that most laptop users never use. Do ten of these whenever you take a break, and you will feel the difference within a few days. The chest opener is the second one worth adding: sit tall, clasp your hands behind your lower back, draw your shoulder blades together, and hold for ten seconds. This reverses the shoulder rounding that comes with hours at a keyboard.
The physio spent ninety seconds watching me work and pointed at my laptop screen. The chair was fine. It was always the screen height.
What Else Helps Once the Stand Is In Place
Once your screen is at eye level, your keyboard is flat on the desk, and your elbows are at 90 degrees, most of the mechanical cause of neck pain is addressed. A few additional things make the improvement stick over the long term. Lighting matters more than people expect. If your window is directly in front of or behind your screen, your eyes are constantly adjusting to compete with that glare or backlight, and the resulting squinting and leaning accumulates in the neck. Position your desk so the window is to the side, not in the screen's sightline. If that is not possible, a matte screen protector reduces the glare substantially.
The height-adjustable laptop stand also means you can experiment with brief standing intervals during the day without moving anything off the desk. The Lamicall is stable on a desk surface without a heavy footprint, so you can raise the height setting to standing level, grab a standing keyboard tray or just a cordless keyboard, and stand for 20 to 30 minutes at a stretch. Most people who do this report that the afternoon energy drop is less severe. You do not need a full standing desk setup for this benefit. A laptop stand plus a wireless keyboard that you pull out when you want to stand is a fraction of the cost and takes up almost no space.
Finally, do not ignore the pillow you sleep on. This is outside the scope of a desk-setup guide, but it is worth mentioning because neck pain that starts from posture at the desk is often aggravated by a pillow that keeps your neck in a compromised position for seven or eight hours at night. If you fix the desk setup and still have residual morning stiffness, the pillow is the next variable to examine. A mid-loft pillow that keeps your neck neutral on your back or side is usually the right choice.

Your neck pain has a cause. Most of the time it is your screen height, and the fix is a forty-dollar aluminum stand.
The Lamicall Adjustable Laptop Stand is the tool I have on my desk every day. Six height settings, fits 10 to 16-inch laptops, no wobble, built-in cable slot, and it takes less than two minutes to set up. If you do steps one through five above, this is the single piece of gear that makes it all work.
Amazon Check Today's Price on Amazon →